Trophies2010
Highest Trophies2010
Exp Level28
3 VS 3 Victories188
Solo Victories41
Duo Victories59
Best Brawler
Darryl*Current + Highest
Trophies

Current Trophies341
Highest Trophies341
Trophies from last 25 ranked battles: +69
See Battle Log
Battle Log
Showdown
0
BountyOvergrown Canyon
+8
BountyOvergrown Canyon
-4
Duo ShowdownDouble Trouble
+9
Duo ShowdownDouble Trouble
+9
Duo ShowdownDouble Trouble
+9
Hot Zone
0
Hot Zone
0
Hot Zone
0
Hot Zone
0
Hot Zone
0
Hot Zone
0
Hot Zone
0
BountySnake Prairie
+1
BountySnake Prairie
+3
BountySnake Prairie
+1
BountySnake Prairie
+1
Duo ShowdownAcid Lakes
+7
Duo ShowdownAcid Lakes
+9
Duo ShowdownAcid Lakes
+7
Duo ShowdownAcid Lakes
+9
Recent Brawlers
From 25 recent battles
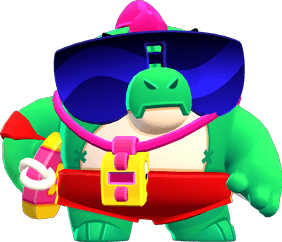
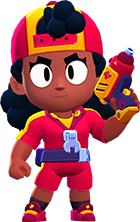
Darryl
Win Rate: 60%
Pick Rate: 40%
Buzz
Win Rate: 25%
Pick Rate: 16%

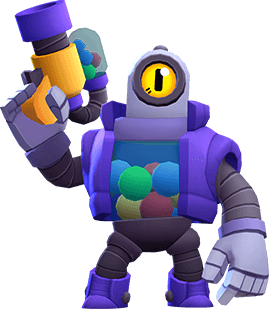
Carl
Win Rate: 100%
Pick Rate: 12%
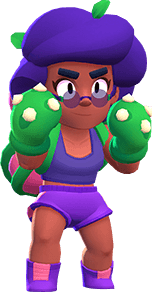
Rosa
Win Rate: 100%
Pick Rate: 8%

Barley
Win Rate: 50%
Pick Rate: 8%
Meg
Win Rate: 100%
Pick Rate: 4%

Brock
Win Rate: 100%
Pick Rate: 4%

El Primo
Win Rate: 0%
Pick Rate: 4%
Rico
Win Rate: 0%
Pick Rate: 4%
Brawlers 18/91
Trophies