![Trophies](/brawl-stars/res/img/icon_trophy.webp)
Trophies3784
![Highest Trophies](/brawl-stars/res/img/icon_highest_trophies.webp)
Highest Trophies3784
![Experience Level](/brawl-stars/res/img/icon_exp_level.webp)
Exp Level38
![3 vs 3 Victories](/brawl-stars/res/img/icon_vs.webp)
3 VS 3 Victories397
![Solo Victories](/brawl-stars/res/img/modes/icon_solo_showdown.webp)
Solo Victories11
![Duo Victories](/brawl-stars/res/img/modes/icon_duo_showdown.webp)
Duo Victories159
Best Brawler
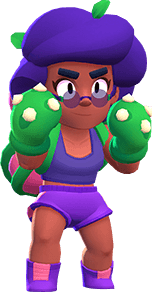
El Primo*Current + Highest
Trophies
![El Primo](/brawl-stars/res/img/brawlers/el_primo.webp)
![Brawler Power Level](/brawl-stars/res/img/icon_brawler_power.webp)
![Suplex Supplement](/brawl-stars/res/img/items/el_primo_gadget_01.webp)
![Trophies](/brawl-stars/res/img/icon_trophy.webp)
Current Trophies535
![Highest Trophies](/brawl-stars/res/img/icon_highest_trophies.webp)
Highest Trophies535
Trophies from last 25 ranked battles: +78
![Gem Grab](/brawl-stars/res/img/modes/icon_gem_grab.webp)
![Brawl Ball](/brawl-stars/res/img/modes/icon_brawl_ball.webp)
![Hot Zone](/brawl-stars/res/img/modes/icon_hot_zone.webp)
![Bounty](/brawl-stars/res/img/modes/icon_bounty.webp)
![Showdown](/brawl-stars/res/img/modes/icon_solo_showdown.webp)
![Brawl Ball](/brawl-stars/res/img/modes/icon_brawl_ball.webp)
See Battle Log
Battle Log
![Brawl Ball](/brawl-stars/res/img/modes/icon_brawl_ball.webp)
Brawl Ball
0![Trophies](/brawl-stars/res/img/icon_profile_trophy.webp)
![Trophies](/brawl-stars/res/img/icon_profile_trophy.webp)
![Brawl Ball](/brawl-stars/res/img/modes/icon_brawl_ball.webp)
Brawl Ball
0![Trophies](/brawl-stars/res/img/icon_profile_trophy.webp)
![Trophies](/brawl-stars/res/img/icon_profile_trophy.webp)
![Showdown](/brawl-stars/res/img/modes/icon_solo_showdown.webp)
ShowdownSafety Center
+8![Trophies](/brawl-stars/res/img/icon_profile_trophy.webp)
![Trophies](/brawl-stars/res/img/icon_profile_trophy.webp)
![Showdown](/brawl-stars/res/img/modes/icon_solo_showdown.webp)
ShowdownSafety Center
+1![Trophies](/brawl-stars/res/img/icon_profile_trophy.webp)
![Trophies](/brawl-stars/res/img/icon_profile_trophy.webp)
![Showdown](/brawl-stars/res/img/modes/icon_solo_showdown.webp)
ShowdownSafety Center
+5![Trophies](/brawl-stars/res/img/icon_profile_trophy.webp)
![Trophies](/brawl-stars/res/img/icon_profile_trophy.webp)
![Showdown](/brawl-stars/res/img/modes/icon_solo_showdown.webp)
ShowdownSafety Center
+8![Trophies](/brawl-stars/res/img/icon_profile_trophy.webp)
![Trophies](/brawl-stars/res/img/icon_profile_trophy.webp)
![Showdown](/brawl-stars/res/img/modes/icon_solo_showdown.webp)
ShowdownSafety Center
+7![Trophies](/brawl-stars/res/img/icon_profile_trophy.webp)
![Trophies](/brawl-stars/res/img/icon_profile_trophy.webp)
![Bounty](/brawl-stars/res/img/modes/icon_bounty.webp)
BountyCube Force
0![Trophies](/brawl-stars/res/img/icon_profile_trophy.webp)
![Trophies](/brawl-stars/res/img/icon_profile_trophy.webp)
![Bounty](/brawl-stars/res/img/modes/icon_bounty.webp)
BountyCube Force
0![Trophies](/brawl-stars/res/img/icon_profile_trophy.webp)
![Trophies](/brawl-stars/res/img/icon_profile_trophy.webp)
![Bounty](/brawl-stars/res/img/modes/icon_bounty.webp)
BountyCube Force
+8![Trophies](/brawl-stars/res/img/icon_profile_trophy.webp)
![Trophies](/brawl-stars/res/img/icon_profile_trophy.webp)
![Bounty](/brawl-stars/res/img/modes/icon_bounty.webp)
BountyCube Force
+8![Trophies](/brawl-stars/res/img/icon_profile_trophy.webp)
![Trophies](/brawl-stars/res/img/icon_profile_trophy.webp)
![Bounty](/brawl-stars/res/img/modes/icon_bounty.webp)
BountyCube Force
+8![Trophies](/brawl-stars/res/img/icon_profile_trophy.webp)
![Trophies](/brawl-stars/res/img/icon_profile_trophy.webp)
![Bounty](/brawl-stars/res/img/modes/icon_bounty.webp)
BountyCube Force
+8![Trophies](/brawl-stars/res/img/icon_profile_trophy.webp)
![Trophies](/brawl-stars/res/img/icon_profile_trophy.webp)
![Hot Zone](/brawl-stars/res/img/modes/icon_hot_zone.webp)
Hot ZoneDanger Zone
-2![Trophies](/brawl-stars/res/img/icon_profile_trophy.webp)
![Trophies](/brawl-stars/res/img/icon_profile_trophy.webp)
![Hot Zone](/brawl-stars/res/img/modes/icon_hot_zone.webp)
Hot ZoneDanger Zone
-4![Trophies](/brawl-stars/res/img/icon_profile_trophy.webp)
![Trophies](/brawl-stars/res/img/icon_profile_trophy.webp)
![Hot Zone](/brawl-stars/res/img/modes/icon_hot_zone.webp)
Hot ZoneDanger Zone
+8![Trophies](/brawl-stars/res/img/icon_profile_trophy.webp)
![Trophies](/brawl-stars/res/img/icon_profile_trophy.webp)
![Hot Zone](/brawl-stars/res/img/modes/icon_hot_zone.webp)
Hot ZoneDanger Zone
-4![Trophies](/brawl-stars/res/img/icon_profile_trophy.webp)
![Trophies](/brawl-stars/res/img/icon_profile_trophy.webp)
![Brawl Ball](/brawl-stars/res/img/modes/icon_brawl_ball.webp)
Brawl BallField Goal
-2![Trophies](/brawl-stars/res/img/icon_profile_trophy.webp)
![Trophies](/brawl-stars/res/img/icon_profile_trophy.webp)
![Brawl Ball](/brawl-stars/res/img/modes/icon_brawl_ball.webp)
Brawl BallField Goal
+8![Trophies](/brawl-stars/res/img/icon_profile_trophy.webp)
![Trophies](/brawl-stars/res/img/icon_profile_trophy.webp)
![Brawl Ball](/brawl-stars/res/img/modes/icon_brawl_ball.webp)
Brawl BallField Goal
+8![Trophies](/brawl-stars/res/img/icon_profile_trophy.webp)
![Trophies](/brawl-stars/res/img/icon_profile_trophy.webp)
![Gem Grab](/brawl-stars/res/img/modes/icon_gem_grab.webp)
Gem GrabMinecart Madness
+8![Trophies](/brawl-stars/res/img/icon_profile_trophy.webp)
![Trophies](/brawl-stars/res/img/icon_profile_trophy.webp)
![Gem Grab](/brawl-stars/res/img/modes/icon_gem_grab.webp)
Gem GrabMinecart Madness
-4![Trophies](/brawl-stars/res/img/icon_profile_trophy.webp)
![Trophies](/brawl-stars/res/img/icon_profile_trophy.webp)
![Gem Grab](/brawl-stars/res/img/modes/icon_gem_grab.webp)
Gem GrabMinecart Madness
-4![Trophies](/brawl-stars/res/img/icon_profile_trophy.webp)
![Trophies](/brawl-stars/res/img/icon_profile_trophy.webp)
![Gem Grab](/brawl-stars/res/img/modes/icon_gem_grab.webp)
Gem GrabMinecart Madness
+8![Trophies](/brawl-stars/res/img/icon_profile_trophy.webp)
![Trophies](/brawl-stars/res/img/icon_profile_trophy.webp)
![Gem Grab](/brawl-stars/res/img/modes/icon_gem_grab.webp)
Gem GrabMinecart Madness
-3![Trophies](/brawl-stars/res/img/icon_profile_trophy.webp)
![Trophies](/brawl-stars/res/img/icon_profile_trophy.webp)
Recent Brawlers
From 25 recent battles
![Barley](/brawl-stars/res/img/brawlers/barley.webp)
Barley
Win Rate: 62.5%
Pick Rate: 32%
![Poco](/brawl-stars/res/img/brawlers/poco.webp)
Poco
Win Rate: 40%
Pick Rate: 20%
![Tara](/brawl-stars/res/img/brawlers/tara.webp)
Tara
Win Rate: 50%
Pick Rate: 16%
![El Primo](/brawl-stars/res/img/brawlers/el_primo.webp)
El Primo
Win Rate: 100%
Pick Rate: 12%
![Brock](/brawl-stars/res/img/brawlers/brock.webp)
Brock
Win Rate: 50%
Pick Rate: 8%
![Piper](/brawl-stars/res/img/brawlers/piper.webp)
Piper
Win Rate: 50%
Pick Rate: 8%
![Rosa](/brawl-stars/res/img/brawlers/rosa.webp)
Rosa
Win Rate: 100%
Pick Rate: 4%
Brawlers 19/91
Trophies