Trophies4815
Highest Trophies4836
Exp Level45
3 VS 3 Victories219
Solo Victories194
Duo Victories110
Best Brawler
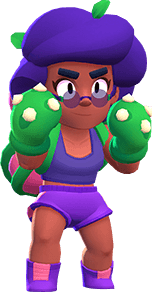
Edgar*Current + Highest
Trophies

Current Trophies500
Highest Trophies560
Trophies from last 20 ranked battles: +28
See Battle Log
Battle Log
Hot ZoneOn the Train
+10
Hot ZoneRing of Fire
0
Brawl BallBackyard Bowl
0
Gem GrabHard Rock Mine
0
Boss FightDanger Zone
0
Boss FightDanger Zone
0
ShowdownFeast or Famine
+8
ShowdownFeast or Famine
-6
ShowdownFeast or Famine
-5
ShowdownFeast or Famine
-1
ShowdownFeast or Famine
+6
ShowdownFeast or Famine
+2
ShowdownFeast or Famine
+8
ShowdownFeast or Famine
+2
Boss FightDanger Zone
0
Boss FightDanger Zone
0
Boss FightDanger Zone
0
ShowdownRockwall Brawl
-2
ShowdownRockwall Brawl
+7
ShowdownRockwall Brawl
-2
ShowdownRockwall Brawl
+1
Gem GrabDouble Swoosh
0
HeistKaboom Canyon
0
Gem GrabHard Rock Mine
0
Brawl BallField Goal
0
Recent Brawlers
From 19 recent battles
Edgar
Win Rate: 62.5%
Pick Rate: 42.11%

Mortis
Win Rate: 50%
Pick Rate: 21.05%

Colette
Win Rate: 0%
Pick Rate: 10.53%

Jessie
Win Rate: 0%
Pick Rate: 10.53%

Lou
Win Rate: 100%
Pick Rate: 5.26%
Rosa
Win Rate: 100%
Pick Rate: 5.26%
Charlie
Win Rate: 0%
Pick Rate: 5.26%
Brawlers 21/91
Trophies